eIDs
Learn how to authenticate users with Norwegian BankID via Idura. This page covers token contents, test user creation, production access, consent model, and other BankID specifics.
Idura is part of Stø (the company behind Norwegian BankID) and helps you add BankID logins to your website or application. You integrate with Idura using one of our SDKs or a standard OpenID Connect library. We handle the BankID API integration for you. When you’re ready to go live, you order client credentials from Stø through the Idura dashboard.
| Country | Norway |
| Operated by | Stø AS |
acr_values |
|
| Levels of assurance (LoA) | Substantial (BankID Biometrics) · High (Kodebrikke authenticators) |
| User data | birthdate · family_name · given_name · name · country |
| Optional user data |
|
| Caller authentication | Sikker samtale |
Once a user has successfully authenticated with BankID, Idura Verify issues an ID token in JWT format to your application. The token contains a set of claims about the user and the authentication event itself. The examples below show the structure of the ID tokens issued for Norwegian BankID logins.
Triggered with acr_values=urn:grn:authn:no:bankid:high (or acr_values=urn:grn:authn:no:bankid)
The level of assurance for these authenticators are: High
The uniqueUserId identifies the legal person corresponding to the login, and is not considered sensitive.
Triggered with acr_values=urn:grn:authn:no:bankid:substantial
The level of assurance for this authenticator is: Substantial
Note that there is no certsubject returned when using Biometrics.
You create netcentric test users in the BankID RA preprod portal.
otp, and the password is always qwer1234.Activation of a new test user can take up to one hour.
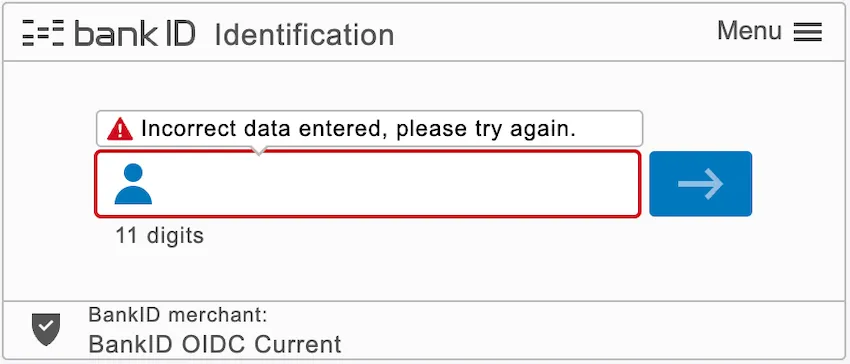
If your existing test user starts failing, for example with an error when you enter the one-time password, its certificate might have expired.
Order a new netcentric BankID to fix it:
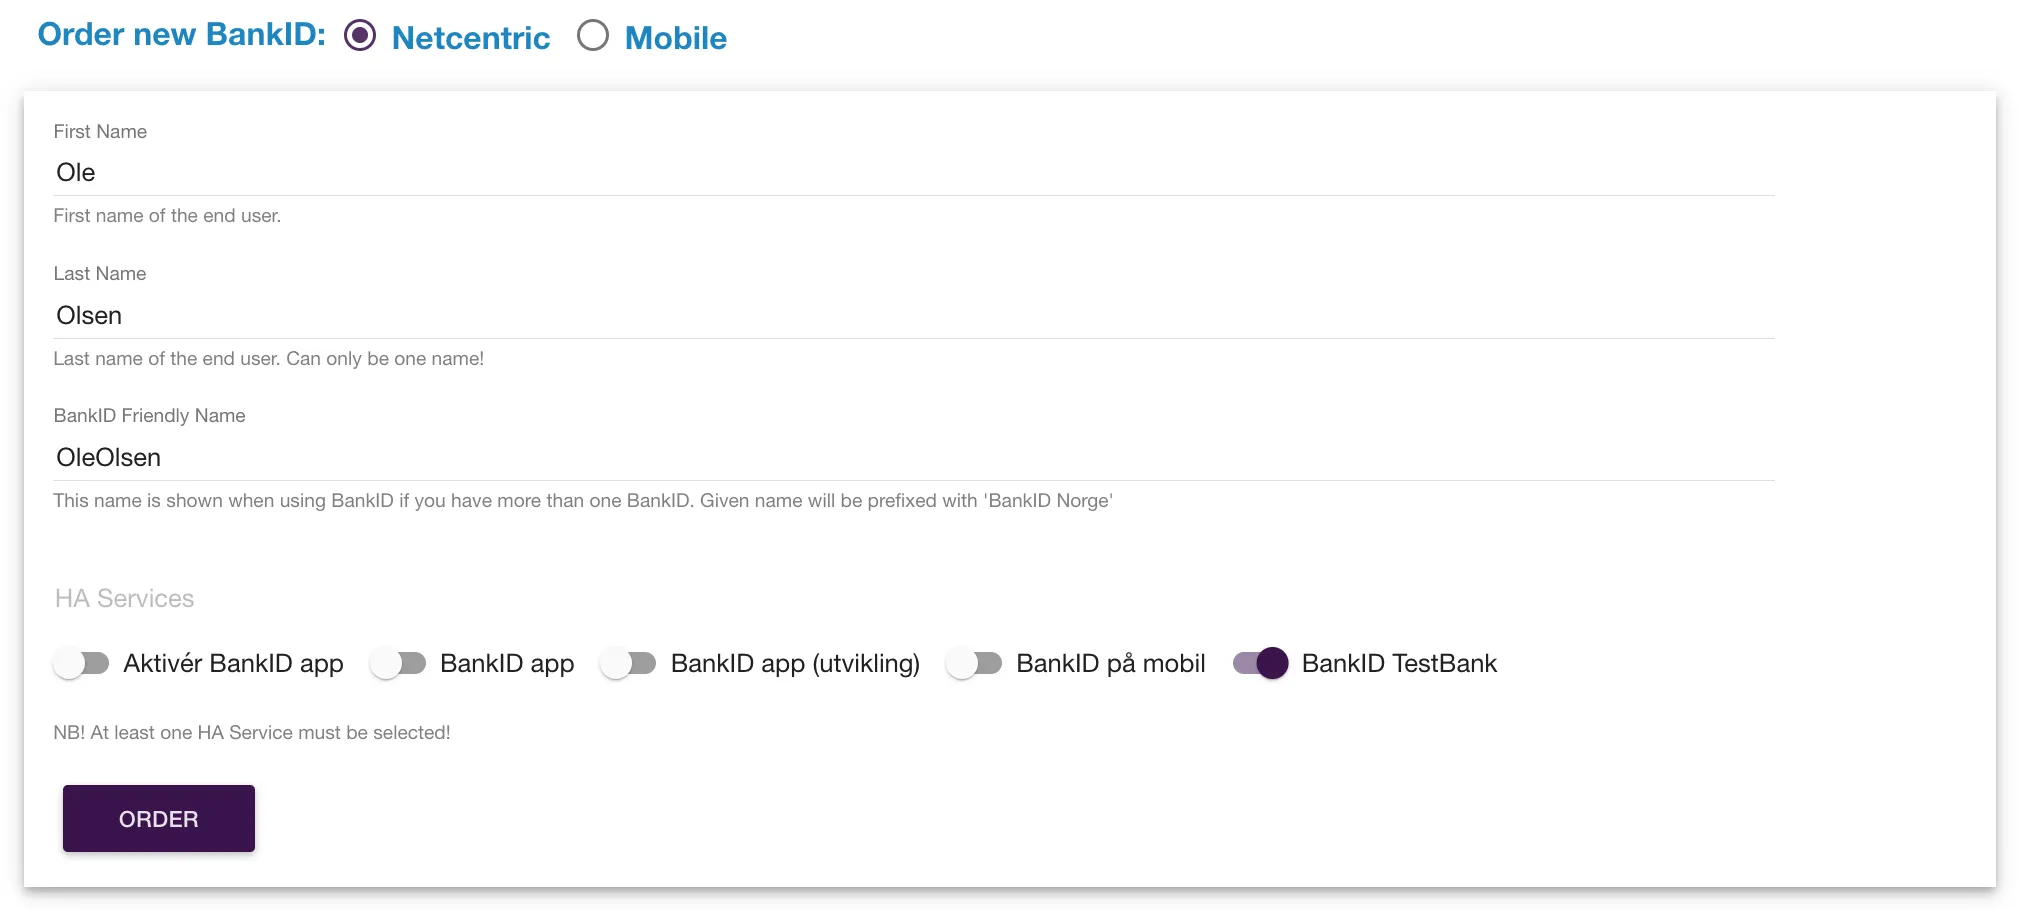
Start by creating a netcentric test user.
You also need to install a test version of the BankID app. Contact our support team to get access to the iOS (distributed via TestFlight) or Android version of the test app. In your request, please provide the email address linked to your Apple ID (for iOS) or your Google account for the Play Store (for Android) you plan to use for testing. Our team will get back to you with confirmation and download links for the test app.
Activate the app before first use:
123456 in the input field and wait for a browser window to open.qwer1234 as personal password and click Next.Basic user information, full name, and date of birth are always made available.
Additionally, you can request the user’s social security number (SSN) by including the ssn scope in your authorize request. (Note that your application must be configured to use dynamic scope strategy.)
Norwegian law governs access to SSN. You request access as part of ordering Norwegian BankID in the dashboard.
| Data type | Released | Verified | scope | login_hint |
|---|---|---|---|---|
| Full name | Always | Yes | ||
| Date of birth | Always | Yes | ||
| SSN (fødselsnummer in Norwegian) | User consent | Yes | ssn | scope:ssn |
https://YOUR_SUBDOMAIN.idura.broker/oauth2/authorize?scope=openid ssn&...Alternatively, you can send the scope in the login_hint
https://YOUR_SUBDOMAIN.idura.broker/oauth2/authorize?...&login_hint=scope:ssn&...which can be useful if you are working with technology that does not let you control the scope value.
To get the user’s phone number and email address, use the BankID Data Sharing service described below.
Stø requires that end-users explicitly consent to sharing their SSN with your application.
To enable SSN access, both a dashboard configuration and a consent collection mechanism in your application UI are required.
1. Configure the dashboard
In the Idura Dashboard, navigate to the Norwegian BankID provider page. In the SSN consent section, select Already granted.
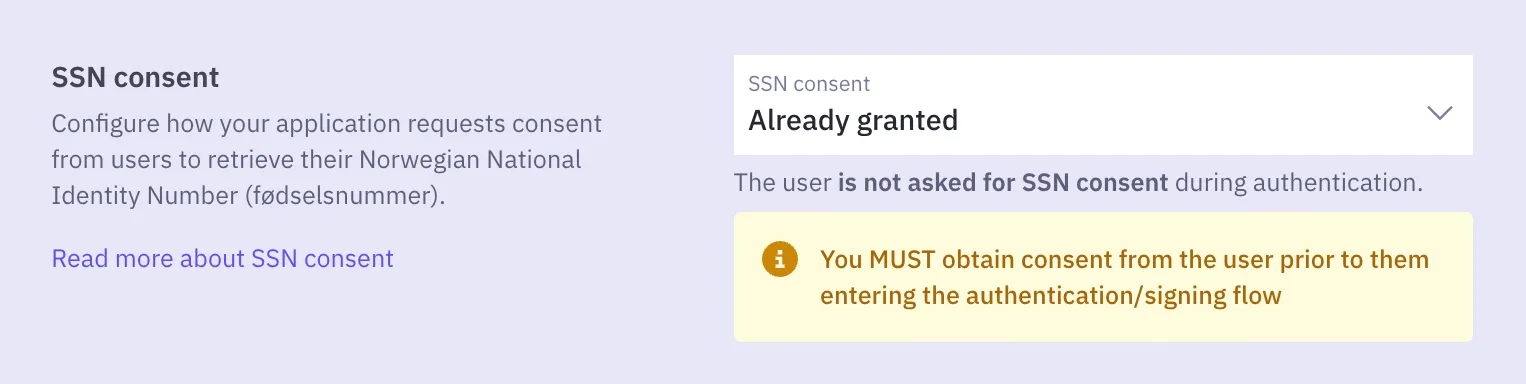
2. Collect consent from your end-users in your website or application
By selecting Already granted, you take responsibility for obtaining the user’s consent to release their SSN before they start the BankID login flow.
In practice, this means adding a step to your application where the user agrees to share their SSN — for example, an explicit consent checkbox, or a notice on the login screen that references your terms of service and privacy policy. The exact implementation is up to you and your legal team.
Idura stores SSN consent for 1 year per tenant. After that period, the user must provide explicit SSN consent again.
Idura does not store the SSN itself, just the fact that the user has granted your tenant access to it.
You can add a "forget-me" link on your website if you want to let users revoke the consent again. Use a normal authorize request as target, but add a prompt=consent_revoke query parameter to the request. Idura will then run a login flow (to be able to recognize the end user), and delete the granted consent.
You can learn more about authorize requests in our authorize URL builder.
You can tweak core operational parameters and configure access to the optional user data on the Norwegian BankID eID provider page of the Idura Dashboard.
Stø is replacing the BankID consent service with a new Data Sharing service. The Data Sharing service is available now as an opt-in, and replaces the consent service from January 1, 2027. In the Data Sharing service, BankID collects consent from the user itself and can release the user’s verified phone number and email address.
Until January 1, 2027, logins use the consent model described in data and consent, unless you opt in to the Data Sharing service. By January 1, 2027, Stø moves all clients to the Data Sharing service, and you no longer need to opt in.
Add data_sharing to the login_hint of your authorize request:
https://YOUR_SUBDOMAIN.idura.broker/oauth2/authorize?scope=openid ssn phone email&login_hint=data_sharing&...The login_hint can hold several values separated by a space, so you can combine data_sharing with other values, such as login_hint=BIS data_sharing or login_hint=scope:ssn data_sharing.
To build a test URL, select Norwegian BankID and BankID Data Sharing service in the Authorize URL Builder.
The BankID client that handles the login must be set up for the Data Sharing service:
The Data Sharing service releases the following data:
| Data type | Scope | Claim | Released |
|---|---|---|---|
| Full name | Not applicable | name, given_name, family_name | Always |
| Date of birth | Not applicable | birthdate | Always |
| SSN (fødselsnummer in Norwegian) | ssn | socialno | User consent |
| Phone number | phone | phone_number | User consent |
| Email address | email | email | User consent |
BankID verifies the phone number and email address. If the user has no verified phone number, BankID asks them to add one during the login.
The phone number and email address are paid data. A login that returns a phone number or an email address is billed for each of them, in addition to the login itself.
With the static scope strategy, Idura requests the data selected in your Norwegian BankID configuration in the dashboard, including the phone number and email address. Test domains that have not configured Norwegian BankID only request the SSN.
BankID asks the user for consent to release each type of data you request, and remembers the consent for later logins. Idura does not store SSN consent for these logins, and prompt=consent_revoke has no effect. Users review and withdraw their consents in Mine samtykker at BankID.
If the user declines to share their SSN, the login fails with the access_denied error. To complete the login without the SSN instead, add ssn_optional to the login_hint, such as login_hint=data_sharing ssn_optional.
If you selected Already granted in the SSN consent section of the dashboard, BankID releases the SSN without asking the user. BankID only does this for clients that Stø has approved to get the SSN without consent. The built-in test client is approved.
BankID Biometrics assurance level is “Substantial”.
Learn more about assurance levels.
If you can only use assurance level “High” in your login flow, you must explicitly specify the login_hint=BID in your authorize requests to Idura Verify. Please note that using login_hint=BID will disable biometrics in the BankID app.
By default, the user flow is controlled by the user-defined settings of the BankID app: no additional configurations required. If necessary, you can adjust the user flow by adding a login_hint to the authorize URL.
The table below provides a list of options for using login_hint with Norwegian BankID, and the resulting user flows. Check our guide on prefilled fields to learn more.
| Parameter name | Description |
|---|---|
login_hint=BID | The user will be redirected to the BankID app, with biometrics disabled. The user will be queried for userID(i.e. national identity number) in the first dialogue. |
login_hint=BID:[SSN], where [SSN] has the format DDMMYYXXXXX | The user will be redirected to the BankID app (with biometrics disabled) along with a pre-selected userID. The userID dialogue is omitted in this case. |
login_hint=BIS | The user will be redirected to the BankID app. The user will be queried for userID in the first dialogue. This option does not disable biometrics. |
login_hint=BIS:[SSN], where [SSN] has the format DDMMYYXXXXX | The user will be redirected to the BankID app with a pre-selected userID. This option does not disable biometrics. |
no login_hint provided | The default settings of the BankID app on the user’s device will determine the flow (whether biometrics are enabled or disabled). |
Have the user approve a text with BankID, such as an agreement or a change to their account, and log them in at the same time. BankID calls this Godkjenning. BankID shows the text right after the user enters their national identity number, and the user approves it before they authenticate. The ID token then holds the approved text.
Approvals are for texts, not for payments.
Prerequisites
Add an authorization_details parameter to your pushed authorization request. It’s a Rich Authorization Request (RAR) with one item of type urn:no:bankid:approval, holding the text to approve (line breaks added for readability, and URL-encode the values in the request body):
POST https://YOUR_DOMAIN.idura.broker/oauth2/par HTTP/1.1
Authorization: Basic $base64_$client_id:$client_secret
Content-Type: application/x-www-form-urlencoded

client_id=$client_id&
response_type=code&
scope=openid&
redirect_uri=$your_return_url&
state=abc456&
authorization_details=[{"type":"urn:no:bankid:approval","text":"Jeg godkjenner avtalen om flytting av kontoen min."}]
The item has these fields:
| Field | Required | Description |
|---|---|---|
type | Yes | urn:no:bankid:approval |
text | Yes | The text to approve, at most 250 characters. An emoji counts as one character. |
BankID shows the text exactly as you send it, so write it in the user’s language. Idura tells BankID which language the text is in: the first language of ui_locales. Without ui_locales, that’s English if the user’s browser prefers English, and otherwise Norwegian Bokmål.
An approval always logs the user in with Norwegian BankID. To choose the assurance level, set acr_values to one of these:
urn:grn:authn:no:bankid:substantialurn:grn:authn:no:bankid:highWithout acr_values, the user logs in at your domain’s default assurance level for Norwegian BankID. An approval can’t be combined with other acr_values.
Then redirect the user to the authorization endpoint with the returned request_uri, as for any pushed authorization request.
Besides the usual Norwegian BankID claims, the ID token of an approval holds the approved text and its digest from BankID:
| Claim | Description |
|---|---|
approvalText | The text the user approved. |
permissionDigest | The digest BankID made of what the user approved: the base64url-encoded SHA-256 of the statement Idura sent to BankID. |
An example of the claims in the ID token of an approval:
An approval is of one specific text, so it’s never answered from a single sign-on session, and it doesn’t start or replace one either. With prompt=none, an approval request returns login_required.
The approval claims tell you what the user approved, on Idura’s word. To show a third party that BankID itself confirmed the text, add evidence to the scope of your request (scope=openid evidence). The ID token then also holds:
| Claim | Description |
|---|---|
evidence | The ID token BankID issued for the approval, signed by BankID. Its permission_digest claim holds the digest. |
permissionStatement | The base64url-encoded statement BankID digested: a JSON object with the text, its lang, and a nonce. |
To verify the evidence:
evidence with the BankID signing keys, and check its iss. The issuer is https://auth.bankid.no/auth/realms/prod in production, and https://auth.current.bankid.no/auth/realms/current in BankID’s test environment. Get the signing keys from the jwks_uri in the issuer’s discovery document (/.well-known/openid-configuration).permissionStatement from base64url, and compute the base64url-encoded SHA-256 of the decoded bytes.permission_digest claim in evidence, and permissionDigest.text in the decoded statement is the text you sent.For example, in Node.js with the jose library:
import crypto from 'node:crypto';
import { createRemoteJWKSet, jwtVerify } from 'jose';

// BankID's test environment. In production: https://auth.bankid.no/auth/realms/prod
const issuer = 'https://auth.current.bankid.no/auth/realms/current';
const discovery = await (await fetch(`${issuer}/.well-known/openid-configuration`)).json();

const { payload: evidence } = await jwtVerify(
  claims.evidence,
  createRemoteJWKSet(new URL(discovery.jwks_uri)),
  {
    issuer: discovery.issuer,
  },
);
const statement = Buffer.from(claims.permissionStatement, 'base64url');
const digest = crypto.createHash('sha256').update(statement).digest('base64url');

const verified =
  evidence.permission_digest === digest &&
  claims.permissionDigest === digest &&
JSON.parse(statement.toString('utf8')).text === expectedText;evidence to Idura, not to your application: its aud is Idura’s BankID client, and the nonces in it and in the statement are Idura’s.Idura rejects an approval that BankID can’t show before the user is sent to BankID. The PAR endpoint returns these errors in its JSON response:
| Error | Cause |
|---|---|
invalid_authorization_details | authorization_details isn’t a JSON array with one item of type urn:no:bankid:approval, or the text is missing, empty, or longer than 250 characters. |
invalid_request | The client isn’t authenticated, the approval is in a signed request object (not supported yet), or acr_values names another login. |
An approval in a regular authorize request, outside PAR, also gets invalid_request.
Once the user is at BankID, your redirect URI can get these errors:
| Error | Cause |
|---|---|
access_denied | The user canceled the approval. |
server_error | BankID didn’t confirm the approval, so it doesn’t count. |
Sikker samtale (secure conversation) lets an agent verify a caller’s identity with BankID during a phone call.
For details and integration instructions, see Caller Authentication with CIBA.
To start accepting real users with Norwegian BankID, you must order your client credentials from Stø. The credentials consist of a client id and a client secret. You order them through the Idura dashboard.
Prerequisites for ordering
To order BankID client credentials for your company, you must meet these basic requirements:
The BankID OIDC Biometrics option is always included in the basis agreement.
To order:
After you submit, Idura reviews your order. Your signatories then receive the agreement for signing. Once everyone has signed, Stø issues your credentials. Expect around 10-13 working days from submission until you receive your credentials. The dashboard shows the status of your order.